I've been wanting to build one of these for a while. They seem to be a good way to hold work for joinery cutting. This one will hold a piece just over 12" wide. It's made from maple. Overall, a pretty simple piece to make. I still have some finishing touches to add, but it is functional and will get me where I want to go. Sometimes I forget to take pictures, so this isn't an in-depth build post. I'm just going to point out a few things.
 |
| The (almost) finished product. Two screws, three boards, simple. I added washers underneath the handles so that they don't turn right up against the outer jaw. Is it called a jaw? Maybe chop is better? Anyway, the piece that is in there is clamped tight enough that you can lift my bench with it. |
 |
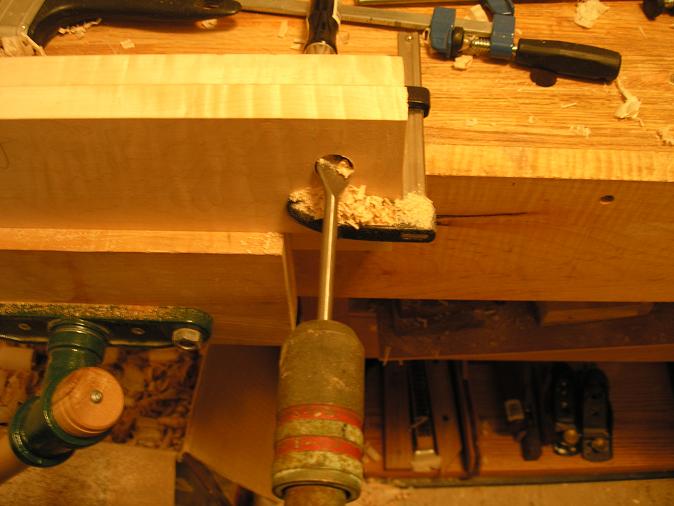
| I don't have any auger bits, so a spade was used. It did the job just fine. |
 |
| When the tip of the spade pierced the second piece, I turned it and bored from the back. |
 |
| The back piece showing the location of the nut. |
 |
| The two pieces clamped up, and holes bored. |
 |
| Here, I've got it assembled. I didn't have the washers at this point. The vise just gets clamped to the front edge of my work bench. |
 |
| Showing the nut. The veneer screws came with bases that are attached to the tips of the screws. For this vise, they are not needed and I just removed them. |
 |
| The back piece is glued/screwed to a shallow rabbet in the base piece. If you make the front chop about two inches longer than the back, you can use it to register the vise against the front of the bench. |
 |
| A little practice cutting. I built the vise to help me dovetails after all! |
 |
| A little more saw practice. All the different cuts required to make dovetails. |
 |
| Here's a better shot of the final vise. I plan to make an "I" beam support to go with it. That will allow me to set pieces up to mark dovetails. |
An easy enough piece to build. I wish I had taken more meaningful pictures as I worked on it. A couple of points to make: Drill the holes for the screw through both pieces at the same time. That will save some work (at least it did for me). Make the base piece three or four inches wider than the chops of the vise. That will allow you to place clamps on it to hold it down to our bench (see the last picture). The base piece has a very shallow rabbet cut into the front edge. The rear chop was glued into the rabbet, then I added a couple of screws to add some strength. If you use the same screws that I did (veneer press screws from Woodcraft) you'll need to get a couple of 5/8 washers to go under the handles. This will ensure that the handles don't dig into the wood under clamping pressure. Lastly, I didn't go overboard with fit and finish. I made sure that my pieces were all flat and square, but I didn't worry about getting rid of every rough edge or tearout. This is a tool, and my shop time can be limited. The insides of the chops got most of the attention so that they would provide a good grip on the work piece. The other reason why I haven't "finished" it is because I still have some ideas for improvements. I want to work those out before I spend too much time making it pretty.


Hi,
ReplyDeletewhere did you get the veneer press screws with the "screw slot" on them? I got a set from wetzler and they came without them.
ralph
Hi, Ralph. I got the veneer screws from Woodcraft
ReplyDeletethanks, I re-read the blog entry and saw what I missed the first time.
ReplyDeleteralph
This is such an inspiring project and your attention to detail shines through.
ReplyDelete