For the manner in which men live is so different from the way in which they ought to live, that he who leaves the common course for that which he ought to follow will find that it leads him to ruin rather than safety.
-Machiavelli

Please visit my new blog: http://baldwinmaker.blogspot.com
Showing posts with label planes. Show all posts

Sunday, May 29, 2016

Plough Plane Iron

Regular reader, Ralph, requested that I make him a special iron for his Record plough plane. "Of course," says I.
I'll try anything once, right?

After a few emails, we made sure we were speaking the same language, and I got to work. I had to work quick, because my day job popped an emergency on me, and if I wanted Ralph to get his iron in a reasonable amount of time, I had to get it done fast.

A special width of .207". It's 3/16" thick, 3 1/2 long, A2 tool steel. The sides of the iron are beveled at 2 degrees...and that's the tricky bit...


Friday, February 5, 2016

New Norris Iron

I hinted about this the other day, and almost for forgot to post it.
The first part I made on my new mill is an iron for my Norris plane. I wanted to be able to use the plane without wearing out the original iron.
All done at home, from cutting to heat treating to grinding.

Seriously, isn't this the coolest thing ever? Coming out of the oven at an ungodly temperature. The iron is A2 tool steel, which means it has to be wrapped in stainless steel foil during the heat treat. You're not seeing the blade here...you're seeing the heat it's giving off THROUGH the foil! I geek out over things like this.

Sunday, October 25, 2015

My First Lie-Nielsen Plane

I've used (and love) Lie-Nielsen chisels, and floats. I've sold off the floats and mortise chisels. One thing I've never had is one of their planes. I love the quality of Lie-Nielsen tools. I could go on and on...

My standard plane needs are rather well satisfied. From scrub plane to smoother, I'm good. Don't need more, nor can I justify them. There's one specialty plane from LN, however, that I've been interested in, and finally picked one up: the Rabbet Block Plane.

Hello gorgeous! As soon as you hold this thing in your hand, you can feel the quality. It has weight, and the machining quality is apparent right away. It is also visually striking.

Thursday, April 2, 2015

Lee Valley Plane Iron

When I got my Stanley SW #3 I decided to get a new iron for it. Since Lee Valley was having a nice little sale last week, it was the perfect time to get one. I've been using a Lee Valley back iron on my #5 and really like it. It was time to try one of their irons.

The original SW #3 iron and back iron next to the Lee Valley/Veritas set.

Tuesday, March 24, 2015

Stanley Sweetheart No. 3 Plane

I found a nice user grade Stanley SW No. 3 the other day. Now I just have to decide if I want to flatten the sole and tune it. I have another No. 3 plane, but it isn't nearly as nice...and not a Sweetheart.


I have a soft spot for Stanley SW tools. The only other SW plane I have though, is a scrub plane.

Monday, February 16, 2015

Squaring up

Important in making anything, whether in wood or metal, is making parts square. It's easy in metal, I put it in the mill. In wood, however, I need to plane by hand. It's nice when it all works out.

Even for simple projects, before anything else can happen, the stock you're using needs to be as square as you can get it. I'm not going to get into the process here, really. I was just very happy yesterday evening when I planed up a piece and found that it was as near perfect as I could imagine.

One of my 6" machinist's squares. I like them because they are way more accurate than a typical woodworking square. This particular one is within .0006" over it's length. I have a couple of different sizes here at home. I also use them at my shop and at work. My local hardware store has them and they are reasonably priced. Most would say that a square made to this level of accuracy is not required for woodworking, and they are likely correct. However, when you factor in cost, it's the best choice. I get these for about $20.

Thursday, February 12, 2015

Kalamazoo Belt Grinder: Primary Bevels

One of the reasons I wanted to buy my belt grinder was grinding plane irons. Lets face it, I'm rubbish with a 6" grinder. I tend to get uneven and overheated results. If you use a bench grinder, you know how quickly you can overheat a blade. I try to be good about quenching...but.

The irons for my Stanley #5 need the primary bevels reground...so, here we go:

You can see that the secondary bevel has all but overtaken the primary bevel. I have two irons for this plane, and they are both in this state. Time to put a fresh 25 degree primary on.

Monday, September 29, 2014

Hand Plane rant (sort of)

Not the blade in question...just there for a picture.
So, someone brings me a hand plane. They say they lent it out and it got dinged. Included in the story is "I've been using hand planes since I was a kid." This brings up a few things:

Ok...if you know how to use a hand plane, why can't you sharpen it yourself?
If you had used the plane before...why are the factory grind marks on the blade?
The plane is 15-20 years old, hasn't been all that well cared for...and you're blaming it on the guy you lent it to? I know what patina is. I can tell a paint stain from last month from one that's 10 years old.


Anywho, I take the plane apart, give it a once over. Checked for flat...not flat...flattened it. Then I took the blade and sharpened it. I could tell that this was the first time the blade had ever been sharpened. The patina is a dead giveaway that this is the original blade.
I only took the blade up to a 4000 grit edge. I could have gone to 8000, but I knew that the user would never appreciate the difference. Reassemble the plane, test shaving, cuts nice.

Here's the best part. I give the plane back to the owner. I removed the blade and showed him the edge. He looks at it disapprovingly, runs it up his arm and shaves a few hairs...frowns...and says, "I guess that'll do."

YOU GUESS??? WTF? Someone who wouldn't know a sharpening stone from a rock on the beach wants to criticize the edge I just handed him?

Needless to say, the blade nearly became a piece of evidence at the police station, but I held my temper.

The moral of the story? Admit when you don't know about something. It's ok. People won't look down on you. I have a hell of a lot more respect for someone who admits ignorance on a topic than someone who tries to fake knowing everything.

(also, if I've seen the butcher job on a knife you've sharpened, telling me you know about sharp plane irons won't work)

I just had to let that rant out.

Sunday, September 9, 2012

Lee Valley Low Angle Jointer

One thing a person will notice walking into my shop, is an abundance of Lee Valley tools. I like them a little (OK, a lot). Another thing that person would notice, is a lack of Lee Valley bench planes (or any "premium" planes). I have a few of their specialty planes and that is part of what drove me to buy the Low Angle Jointer.
My purchase of the LA jointer represents my first "premium" bench plane and my first bevel up plane. I wanted a wider jointer than my woody, which has only a 1.5" blade. I liked the idea of the versatility of this plane as well. Change an iron, and basically change the plane. Add a fence and make shooting an edge an effortless job.
So, here's my thoughts.
Fresh out of the package. The 25 degree iron is installed, plus I got a toothed iron, and the shooting fence.

Tuesday, June 26, 2012

Another note about back irons (sort of)...

Ok, so I just gave you a bunch of thoughts and opinions and glossy pictures talking about the fun of tuning a back iron. How 'bout I throw a monkey wrench in the works and say that the size of the mouth is more important? And then, once I've said that...how bout I post a picture of my favorite smoother? A tiny little five and a half incher, with single 1/4" iron and a tight mouth. Let's not forget the 55 degree cutting angle. Yeah, this plane pretty much rocks.

Yup, love this thing.

Back irons, pt 3

In part two we looked at the back iron for a jack plane. Now lets have a look at the role of the back iron in a smooth plane. I have an old Lakeside #3 size plane that I've never been able to tune all that well, don't know why, but I have just had a hard time with it. Like my jack plane, it has a two inch iron. Anyway, the fit of the cutting iron and back iron looks decent. Let's see how it performs.
The smoother set to go. I have the back iron set at .010" from the cutting edge.

Sunday, June 24, 2012

Back irons, pt 2

Ok, so I said in part 1 that I would prep the back iron for my Stanley No. 5. Here goes...

Here I have cleaned up the leading edge of the back iron. I put it in a honing guide and ran it over some 600 grit sand paper. If you look close at the leading edge of the cutting iron, you'll notice that some knob decided to drop it right before taking the picture. (shhhh...I'm the knob) 

Saturday, June 23, 2012

Back irons, pt 1

Back iron. Chip breaker. Call it what you will. It's part of the hand plane puzzle (unless you use only single iron planes).
The back iron from my old #3 smooth plane.

Friday, June 15, 2012

A name I've never heard

While poking around today I found a neat old plane iron by a maker that I've never heard of before. It's a laminated blade with a W. Ash & Co chip breaker. The blade is from Wm. Bingley. If anyone that reads here happens to know anything about Wm. Bingley, please drop me a line! I'd like to put the history to the tool. My first guess is English, but that is just a guess.

Update: I also posted this at Sawmill Creek. Here's the thread, lots of good info here.

Saturday, December 17, 2011

Iron envy?

I just got a "new" iron from a fellow Creeker. It's a 2 3/4" Baldwin. It's damn near massive enough to have its own gravity. No idea what I'm going to use it for (though there's an idea floating around in my head).
That's a 2" Stanley iron, starting to look kinda wimpy.

Saturday, December 10, 2011

Some new planes...

I recently purchased two raw plane casting kits from St. James Bay Tool Co. One is a miter plane, and the other is a Norris no.51. Both are in bronze, with the miter plane having a steel sole. As I start to work on them, I'll likely start a separate page for each to update progress. There is a lot of machine work to do, and will likely take me some time.

Thursday, December 8, 2011

Planing board

A simple way to plane thin boards. This is obviously not an original idea. I glued two strips down to a flat board in a "T", the force from planing holds the piece into the corner, and voila! We can plane thin stuff. Another perk is that there is no clamp to distort the piece.

Tuesday, November 29, 2011

Working on that infill (still)

I've been going into work early to squeeze in some time on my infill during the week. I don't have a decent vise for metal work at home at the moment. I just pack up my little red tool box full of files and spend 45 minutes or so putzing away before starting work. It's a nice way to start the day. I'll have to do a separate post about the saw and files...and the cold chisel. The little things in life can be extremely satisfying, and for some reason, the cold chisel that I've been using is one of those things. Anyway, onto business..
Here's the brass sides. I did a little additional filing to help sharpen the corners a bit before marking them onto the steel sole. We'll get back to these guys for some more filing and drilling, hopefully later this week.

Friday, November 25, 2011

Scrub plane

Not everyone is in to scrub planes. I am. I've read differing opinions on their use and origin. For instance, some say that they are a rather late comer to the plane game and are a bit of a cheat. Others say they are of German descent and were meant for edge preparation. I don't have the research resources to confirm or deny any opinions. All I know is that they are infinitely useful. I especially like them for preparation of very rough edges...like those found on stock coming straight off the mill saw.
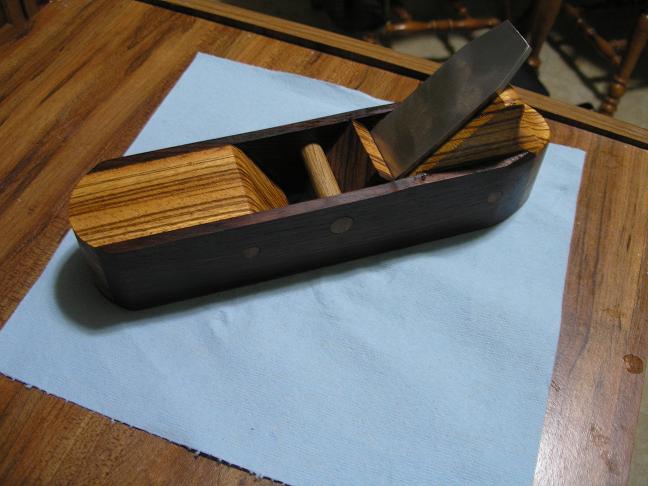
Back about a year ago when this thing was new. It's a bit of a fashion statement. The wood selection was on purpose...to annoy those who are more sensible. Let's just say that I'm not quite into these stark contrasts much anymore.

Thursday, November 24, 2011

The joy of toolmaking

It's a very satisfying feeling when you can make and use your own tools. It's even more so when they perform well. This is my jointer, 23 1/2" long, with a 1 1/2" x 1/4" iron that I made.
Yes, the tote is ugly. And yes, I put it in a bad spot for adjusting the iron.